In this post I will show you how to transform a plain pair of shoes into your own unique creation using just paint, paper and glue. This project will take you 4-6 hours from start to finish.
Tools and materials:
- An old pair of shoes: leather works best, avoid suede or fabric
- A couple of medium-size flat paint brushes, an old kabuki brush
- Scalpel, nail scissors
- Paper towels, soft cloth, newspaper
- White acrylic paint or acrylic primer
- Sanding block, fine grade sanding paper
- Patterned paper napkins: the three main places where I source these are Ikea, Flying Tiger and online sources such as Napkin Shop on Ebay.
- Glue: I recommend “Mod Podge outdoors” for this project


First clean either the whole shoe or just the area you intend to decoupage with a piece of cloth soaked in methylated spirits. The purpose of this is to remove anything greasy that may be on the surface of the shoe. If the shoes are dark it is best to give them a coat of white acrylic primer or acrylic paint first, as napkin paper is very transparent and therefore looks best on a light background. If in doubt, test your paper first: paint half a square of white card with black acrylic and then glue the paper across both halves to see how it looks on dark vs light background. Wait for the paint to dry – 20 to 30 minutes.
Prepare the paper: napkins have three layers: you want to separate them and use the top one.
Decide on your pattern: random torn pieces work best and are easiest to apply.
Starting from the border of the shoe, paint a very thin layer of glue, pat down a piece of paper with your finger and lightly brush a layer of glue on top. Do the same with the next piece, slightly overlapping on the previous one. Alternate between shoes if the surface starts getting soggy. Avoid touching the pieces of paper you’ve just glued as you may lift them. Once the whole area is covered, allow to dry.

When the shoes are completely dry, trim any untidy edges with the scalpel. Then sand down any uneven or wrinkled areas with the sanding block – do this very lightly or you may tear the paper. Dust the powder off with the kabuki brush.
Paint a thin layer of glue all over. Allow to dry: you may notice that this top layer stays tacky for quite a while, as it takes 2-3 days for it to “cure” and dry completely. After that your upcycled shoes are ready to wear and be admired!

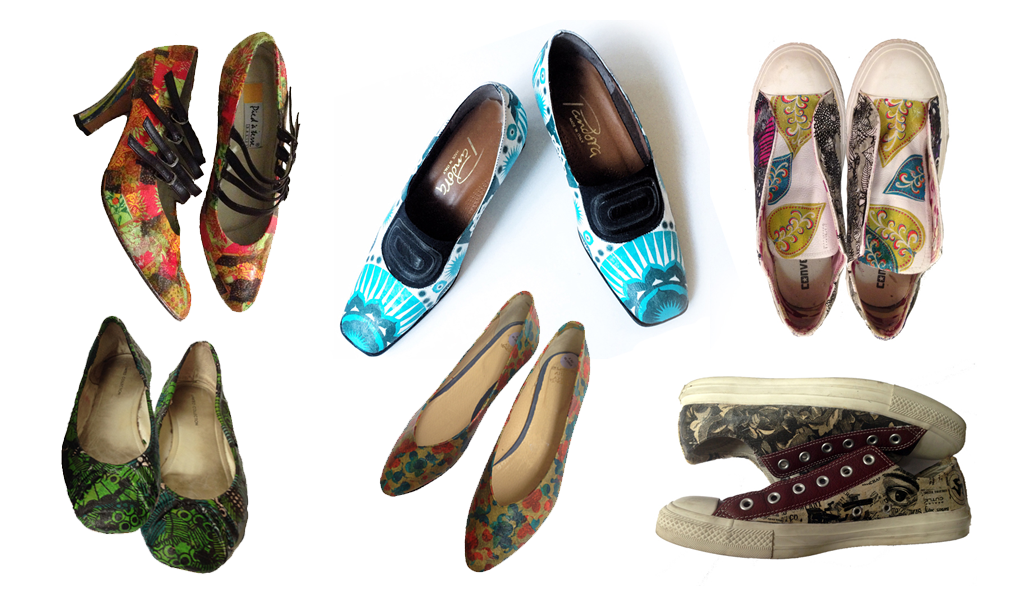
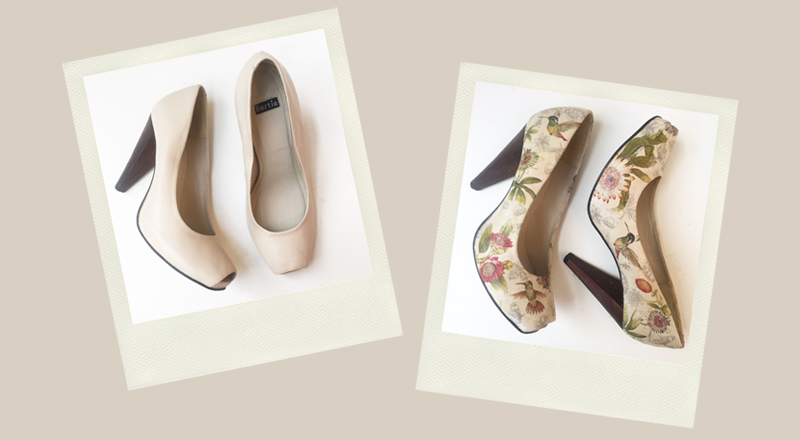
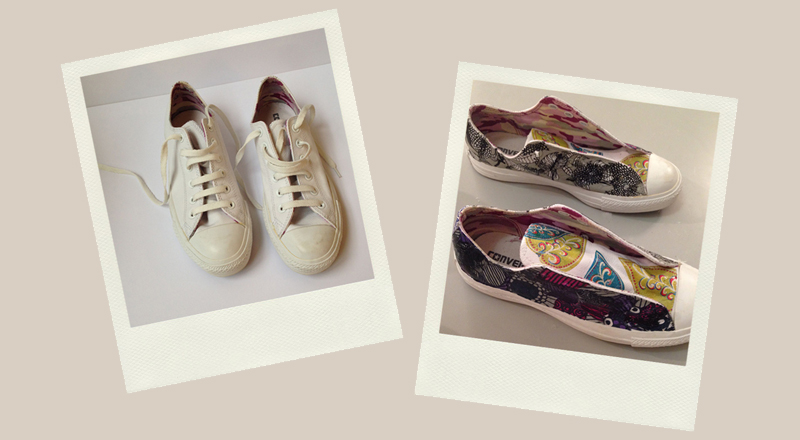
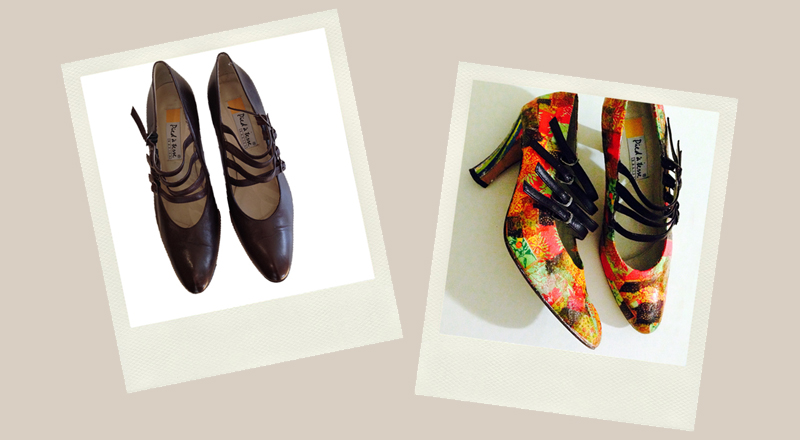
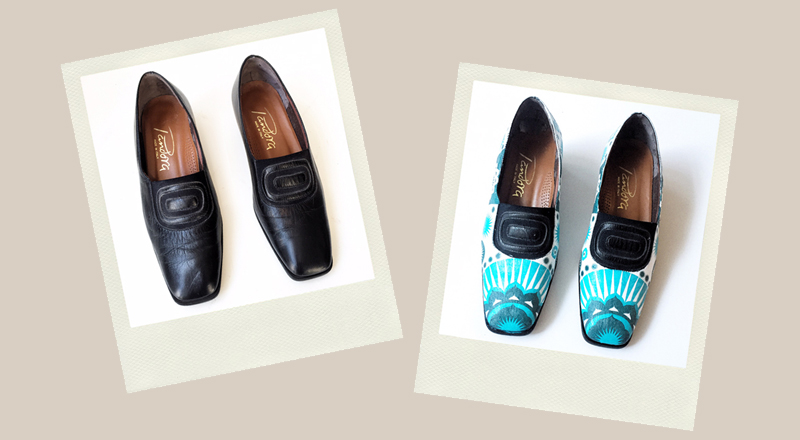
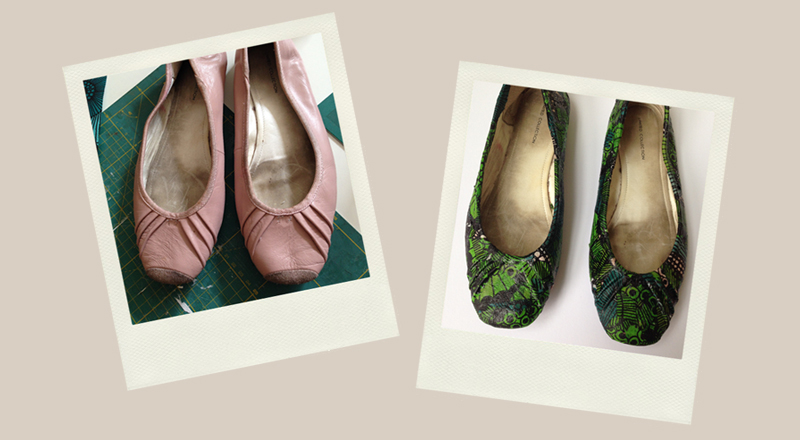
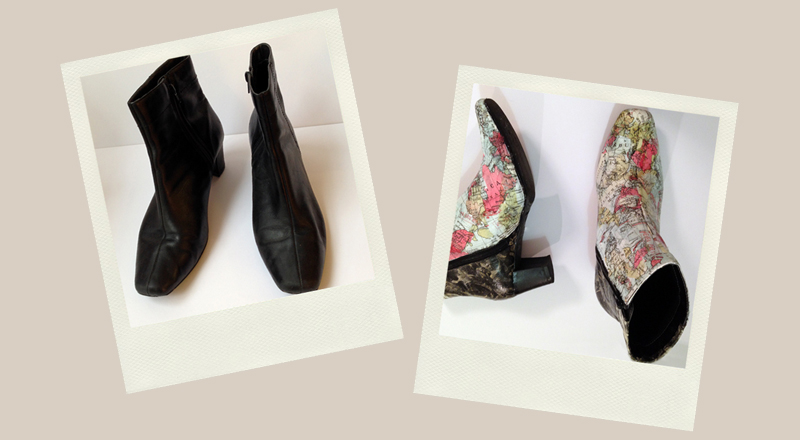
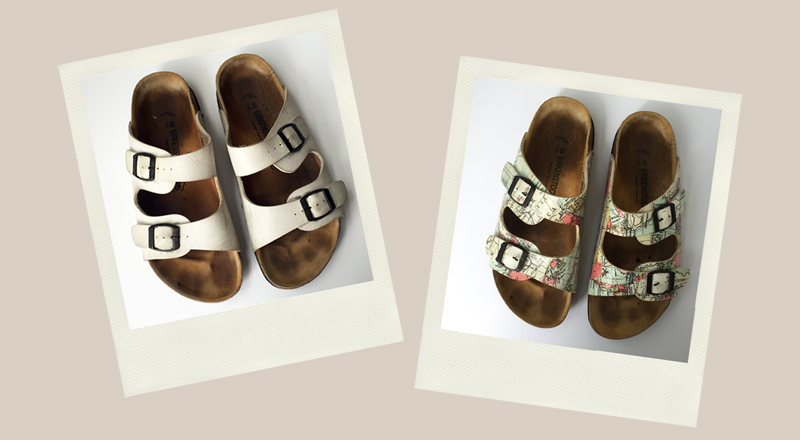
Below you can see several stunning examples of work by students who attended one of my shoe decoupage workshops. None of them had previous experience of the technique, which they learned under my guidance over the course of a four-hour class. Interested in attending one of my upcoming creative courses? Find details and see next available dates here.

Search Posts
Recent Posts
Follow Us
Gabriela Szulman
ARTIST & MAKER
My work is often humorous and whimsical – unless my romantic side takes over and then we enter into a fairy-tale territory of old-fashioned script, pages of books and music scores populated by chivalrous gentlemen, glamorous ladies, butterflies and rabbits.
LEARN WITH ME
Would you like to explore your creative side? I use the wonderful techniques of decoupage and collage in much of my work, and now I can teach you how to create your very own masterpieces!